Monday, April 23, 2012

Rice Krispies Redo


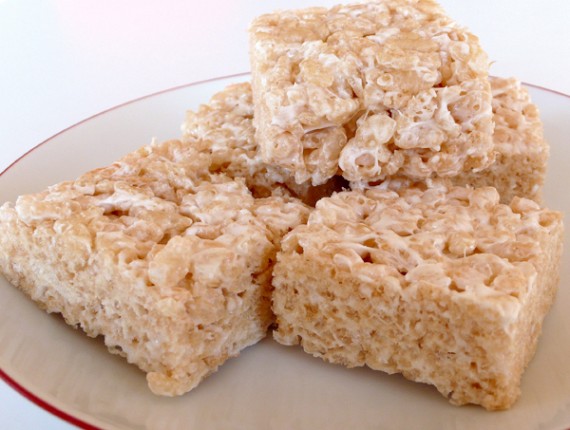
Rice Krispies Treat Redo.....Living in a house with two people who love Rice Krispie Bars and never having been a big fan, I recently saw an article that got me thinking.....could I learn to like them?  One of my many magazines (I am a self-professed magazine whore) had ideas for updating the typical treat to a new level.
So....over the next few weeks I will be trying new concoctions of these age old treats....trying them out on friends and loved ones...and of course blogging about them.


The first one on the list....my husbands favorite ice cream flavor....sea salt and caramel meets Rice Krispies.


Here is the recipe.....
Caramel:
1 (14oz) bag of caramels unwrapped (about 50....enlist some help)
1 (14oz) can sweetened condensed milk
1/4 cup unsalted butter

Squares:
1/4 cup unsalted butter
1 (10 1/2 oz.) bag mini marshmallows
1 1/2 tsp. vanilla extract (I like Penzys Mexican vanilla)
3 tsp sea salt flakes
8 cups Rice Krispies Cereal

Caramel:
Stir ingredients in a medium saucepan over medium-low heat until melted and smooth. Remove from heat.

Squares:
Line a 13 by 9 inch baking pan with nonstick foil or parchment extending 2 inches beyond the edge.
In a large pot melt butter and add marshmallows stirring with a rubber spatula until smooth.
Stir in vanilla, 1 tsp of the sea salt, and 1 cup of the caramel mixture.  Add Rice Krispie cereal and stir until blended and smooth.
Press mixture into pan and cool completely.  Spread remaining cup of caramel mix over cooled cereal and sprinkle with remaining sea salt.  Remove from pan, peel off foil and cut into squares.


So....after dishing them out.....the verdict is.....kids love them (my daughter and her friends took the pan to her bedroom later that night)....however, most of the adults agreed.....way too sweet.  I think that adding the caramel into the treats and putting it on top...is just overkill.  So back to the beginning of trying to find a treat that I love.......

Tuesday, April 17, 2012

First try at Crepes

Here are my yogurt and fruit crepes.  They aren't pretty, but they taste good!  I served them with a sausage, egg and potato (frozen french fries) skillet, which will be in a future post. 


I must admit - I have never tried to make crepes before.  I love crepes, especially if you are looking for something light for breakfast, and have ordered them many times at different restaurants and they were always great!  I have seen them being made on several TV programs, and thought, 'Oh, that looks easy, it's just like a thinned-out pancake'.  Well, let me tell you, it's not as easy as it looks!  


A friend of mine sells Wildtree products, and I bought the mix thinking I could whip up a batch of crepes super quick one morning.  

So, this was the morning that the inspiration for crepes sprung upon me.  I got out the mix, and followed the directions - 1 1/3 cups of water and slowly add mix while whisking.  Great, super easy, no problems!  Until - I tried to cook them in the pan.  

The first one turned out to look like a yellow heap of gelatinous gunk.  No harm though, this was my first one ever, and I figured I may not get it right on the first try.  


Well, the 2nd and 3rd tries weren't that great either.  The directions on the box said to swirl around to get the crepe to cover the bottom of the pan, and then to flip over after cooking for 30 seconds.  On my second attempt, I got the hang of swirling the batter around to cover the bottom of the pan, but the flipping of the crepe didn't work for me...at all...no way, no how!  


Well, my crepes don't look pretty, but a lot of my food doesn't look pretty.  I know you eat with your eyes first, but for me it really is all about the taste!  

When my husband asked me what a crepe tastes like...he had never tried one, not even off my plate, I described crepes of not having a lot of flavor.  The great thing about crepes, to me, is that they highlight your filling, it's just a nice background for you add whatever you would like...like these beautiful looking strawberries and bananas! 


So, I took the two best looking crepes and began to put my filling in them.  For me, I like to keep them simple.  For the filling, I took some yogurt (Belfonte Light Strawberry Banana flavor) and added fruit that I had already cut up.  It's that simple, but oh so tasty!  


Here's how I assembled them... I took my first crepe and added about a tablespoon of yogurt...add how much you like, (but remember that it's easy to over fill!).  Then add your fruit...I used strawberry, banana and pineapple.  Once you have it in the middle of your crepe, just roll it up, kinda like a burrito, but leave the ends open.  You can play around with it a couple of times to see how much filling is the right amount for you.  


The taste of the crepe was really good and hit the spot!  Like I said, the look of them wasn't great, but for my first attempt it wasn't too bad and I think it will only get better trying again.  Next time, I may even try to make my own batter!


I didn't use all my crepe mix, and it says that it will store in the refrigerator well for a few days, so I think I might try to make a savory crepe for lunch tomorrow.  Yum!

Wednesday, April 11, 2012

Focaccia, Food Club and Fun


February was our first anniversary for six crazy Chicks that Cook to get together for their bi-monthly food (aka dinner...but food rhymes much better for the title) club gathering.  Last year was the first year for our group to meet, and we decided we would meet every other month, with a different person hosting each month.  The dinner club was an idea that we had, and found some great women to help compliment each other.  Honestly, this is some of the best food I've eaten...it's like a four star restaurant!  Each time we meet, everyone goes out of their way to make something extraordinary.  Check out our blog in a couple of weeks where we introduce the participates and talk about our 'Guidelines'...even though they are really rules because you get ridiculed if you break one...not that I have!

So, on to the food...

For our first dinner club of 2012, Chicks that Cook decided to try our hand at homemade focaccia. The results were wonderful....and it was easier than we expected!  Definitely easier than us agreeing how to pronounce 'focaccia'.


Here is the recipe for the focaccia: 

2 3/4 cups all-purpose flour
1 teaspoon salt
1teaspoon white sugar
1 package (2 1/4 tsp) instant dry yeast
1 teaspoon garlic powder
1 teaspoon dried oregano
1 teaspoon dried thyme
1/2 teaspoon dried basil
1 pinch ground black pepper
1 Tablespoon vegetable oil (I used Canola)
1 cup water


In a standing mixer fitted with the paddle, combine flour, salt, sugar, yeast, garlic powder, oregano, thyme, basil and black pepper.  Mix in the vegetable oil and water.  Mix until the dough has pulled together (about 3 minutes).  Switch to dough hook and knead for 7 minutes.


Lightly oil a large bowl, place the dough in the bowl, and turn to coat with oil.  Cover with a cloth and let rise in a warm place for one hour.


Oil a lipped baking sheet.  Place risen dough in the center of the baking sheet.  Press dough, starting from the center and working your way out, to the edges of the sheet.  This takes some patience; do not rush because it will get there eventually!  Cover with a clean kitchen towel and let rise for another hour.  After the last rise, lightly press your fingertips into the top of the focaccia dough to give it that classic 'dimpled' focaccia look.


Ricki was our host for food club, and she mixed together the focaccia to let it rise before the rest of the group showed up.  Here is a picture of what it looked like before we put our toppings on it (that's Ricki's hand at the top of the picture giving us instruction on what to do next):

Since there are six of us in our dinner club group, we split up into pairs for each team to come up with a topping for their half of the focaccia.

Dee and Mary decided to do spicy toppings with Spanish chorizo, jalapenos, tomatoes, fontina cheese, and roasted garlic.  Basil infused olive oil was drizzled over the toppings before going into the oven.  No recipe needed for this one, just roast the garlic and then add the rest of the ingredients uncooked on top (they will cook while the focaccia bakes).  

Linda and Kathy did Greek inspired toppings with artichokes, kalamata olives, red onion, oil-packed sun-dried tomatoes, mushrooms, crumbled feta cheese and this wonderful sauce of 1/2 cup mayo in food processor with 4 cloves garlic.
                       
Ricki and Carol did Vegetable Goddess toppings for their half of the focaccia.  Their toppings consisted of broccoli, onion, zucchini, fontina cheese and olive oil.  This one had a spinach pesto as the sauce....recipe is....
3 Cups Spinach leaves
1 Cup Parsley leaves
3 Garlic cloves
1/4 cup grated Parm
Zest and juice from one small lemon
1/3 cup extra virgin olive oil
salt and pepper to taste
In a food processor pulse spinach, parsley, garlic, Parm, zest and juice until minced. Drizzle in oil and pulse until blended...season with salt and pepper.

The other half of the focaccia (since we only had 3 halves covered) was covered in cheeses that were left over from the other toppings.  The picture below shows the cheese being added to the focaccia.

The results: Very good...the Greek one being the tastiest....had something to do with the mayo sauce (you have to try it to understand)

The cheese one was bland and we thought that the spicy one could have used some marinara sauce to add to the flavor.
The vegetable one was very tasty.....any veggie lover will love this one...the spinach pesto could be used in many recipes.

Our hope this year is to push our food club out of their comfort zones and do some hands-on learning in the kitchen.  On the agenda to come....homemade tamales and raviolis.....stay tuned.